


Back To Basics Seeding 101
Like it or not, summer is quickly coming to a close. Before long, the pools will be shutting down for the season, the kids will be heading back to school, and for many of us football will again take center stage.
And for those of us in the turf business, we are heading into the perfect time of the year to tackle those seeding projects on our lawns, golf courses and sports fields. In our geography, the next 5-6 week window is the prime time to get moving on those seeding jobs. Mother Nature’s help with warm soil temperatures, cooler air temperatures, reduced weed pressures, and the return of consistent rainfall events also aids our endeavors. But alas, we all know we can’t totally rely on Mother Nature to get the job done right every time. There are several things WE can do to increase the chances for a successful seeding:
BEFORE SEEDING
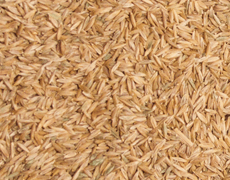
• Select the right seed for the job: This seems like a no-brainer, but is often overlooked. Picking the right species is the first step in a successful seeding.
• Invest in a soil test: A basic soil test is relatively inexpensive tool and can provide valuable information on soil pH and fertility deficiencies that may need to be addressed.
• Perform proper site prep: Rough grade for proper surface drainage and remove all debris. Incorporate any soil amendments at this time.
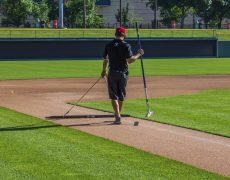
• Take pride in the finish grade: The goal is for the final grade to be firm enough to support any seeding equipment, but loose and crumby enough on top so that the seed can be properly raked into the top quarter inch of soil.
AT SEEDING
• Follow seeding rate guidelines: These rates are established for your success in mind. They will vary greatly among species and can also vary according to your task (new establishment vs. a renovation with existing turf cover for instance).
• Ensure maximum seed-to-soil contact: For me, this is the single–most important key to a successful seeding. By whatever means necessary, you must make sure the seed is in contact with the soil. This can be accomplished by using specialized equipment that does most of the work for you such as a slice-seeder or Brillion-type machine for bigger jobs. Or you can go low-tech by simply broadcasting the seed, lightly raking it in, and then going over the area with a small roller. Regardless of the method used, it is also a good idea to apply the seed in two or more directions to ensure even distribution.
• Apply a quality starter fertilizer: Starter fertilizers are high in phosphorous and enhance seedling germination and development. I prefer to do two applications of starter fertilizer: one at seeding and another 3-4 weeks later. There are also many biologically active and bio-stimulant type products available that can help to “supercharge” the establishment process. By providing healthy doses of all kinds of complex sugars, vitamins, micro-nutrients, plant hormones, surfactants, humic acids and beneficial microbes, seedling germination and vigor can be significantly increased with these types of products, especially in challenging environments. Consider using one or more of these products as a companion to your traditional starter fertilizer.
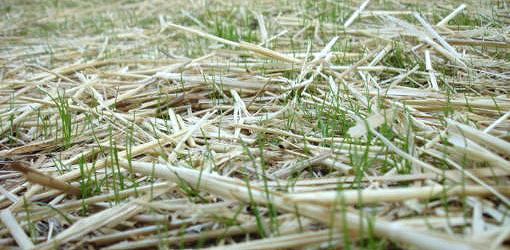
• Use mulch: A light layer of mulch will help retain moisture, protect the young seedlings and reduce erosion. However, don’t apply too much. A good rule of thumb is that you should still be able to see approximately half bare soil after you have applied the mulch.
AFTER SEEDING
• Dial in your watering: The seedbed needs to be kept moist at all times. Light, frequent irrigation is the key in the beginning. Depending on the weather, this could require 2-4 irrigation events per day. Once the seedlings are about 2 inches tall, you can reduce the frequency and begin to water more deeply.
• Don’t be afraid to mow: Mowing will encourage the seedling turf to fill in more quickly. Make sure the ground is firm and the mower blades are sharp. You may only mow 30% of the plants on the first mowing, as the stand will be in different stages of development. But that’s OK! With each successive mowing you will mow more and more of the plants and they will continue to mature and fill in.
• Feed the “babies”: Young grass plants are like little babies; they grow fast and require plenty of food. As I mentioned before, I like to apply a second round of starter fertilizer a few weeks after germination, usually around the first mowing. One more feeding with a balanced, slow release fertilizer another 4-5 weeks after that should carry you into winter.
• Clean up the weeds: Disturb the soil and combine that with plenty of water and fertilizer, and chances are you will have more growing in your seeded areas than just the desired grass seed you planted. No need to worry about annual grassy weeds like crabgrass that may show up: they will die as the frosts return and can be controlled the following spring with a pre-emergence product. Instead, focus more on the broadleaf weeds that me be invading your new seeding. Once the turf has been mowed 3-4 times, it is usually mature enough to handle a broadleaf weed herbicide application. Be sure to read the herbicide label closely to ensure maximum safety and effectiveness.
No matter the size or complexity, Advanced Turf Solutions carries all of the products you need to help you tackle your seeding projects.
Joby Morrow
Equipment Sales Manager